“UV mapping ” by Wojtek “Buddy” Starak
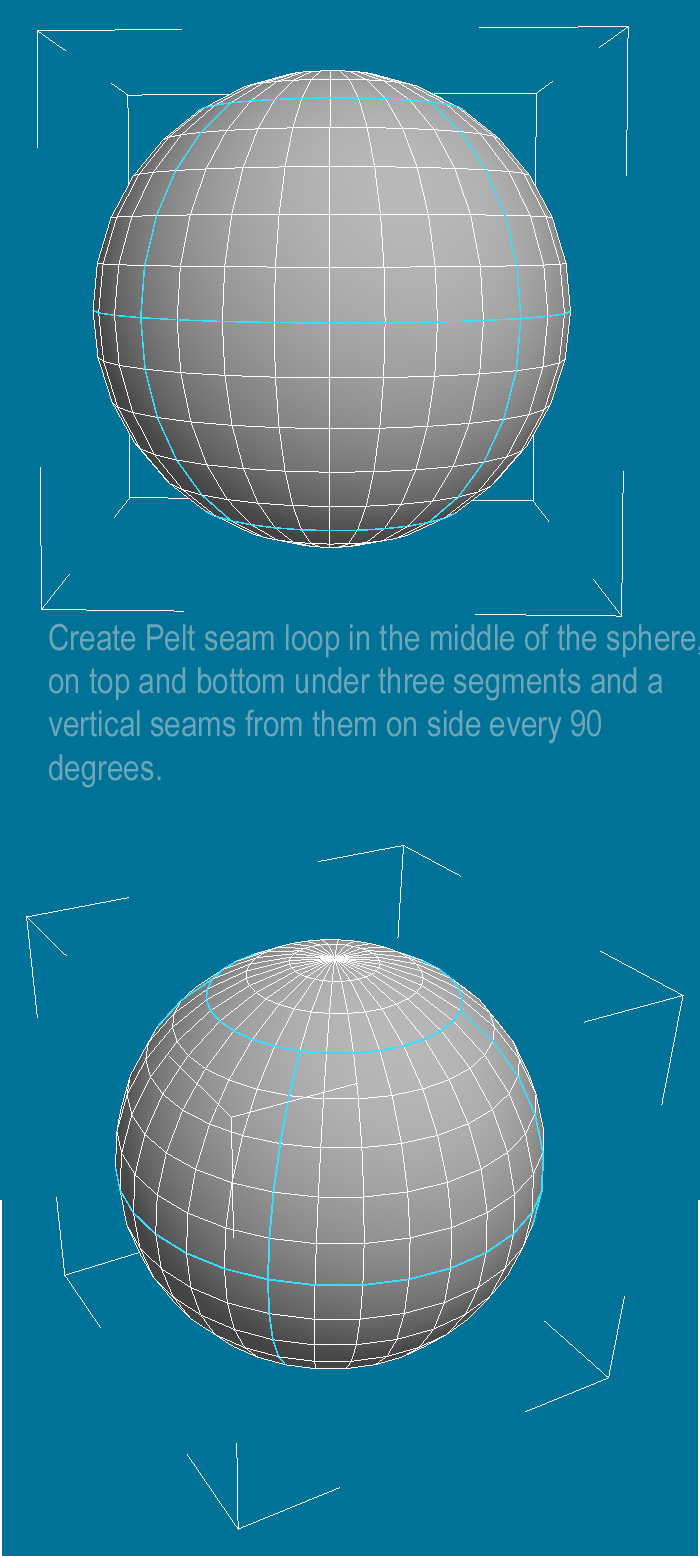
Pelt Mapping – One of newer features in 3dsmax, it’s a mapping method that allows You to pick a selection of polygons and stretch it using „Pelt Seams” as a „pulling belt” to all sides. It’s usefull for organic models like characters and round inorganic objects like a fisherman hat 🙂 .
Step-by-step how to use Pelt Mapping:
1.Create a sphere, radius 50, segments 32.
2.Apply Unwrap UVW modifier,
3.Select all polyguns with „Face” Sub-object. (Pelt works on Polygons only)
4.Click „Pelt” Near other mapping modes (Planar, Cylindrical, etc)
5.Check „Show No seams” under Display tab. (To hide all UV clusters seams, and leave only Pelt seams to setup them.).
7.Turn on Edge Faces in Perspective viewport (RMB on viewport title and check Edge faces)
8.Set up Pelt seams, Few Alternatives/Ways to do this:

a)check „Point to Point Seam”, it works by turning edges that are between two or more points selected by user.
b)check „Edit Seams” and select Pelt seam edges manually
c)change from „Face” to „Edge” Mode select edges and click „Edge Sel to Pelt Seam” (Red selections will turn to blue Pelt Seams), go back to „Face” subobject.
No matter which way You choose, You should end with a sphere divided into 8 Pelt clusters.
9.Uncheck „Pelt”, and select one of the 8 clusters (fallow blue lines which cut them), check „Pelt” again.
10.Click „Edit Pelt Map”, a edit UVWs window and a Pelt Map pop up will appear,
11.Use „Simulate Pelt Pulling” several times until uv cluster will have a reasonable and proportional shape, play around with settings, it’s the best way to get a point what they are created for.
12. Close Popup, Uncheck pelt and move the uv cluster somewhere on the side (in UVW edit window)
13. Repeat steps 9-12 an all 10 clusters, every next one move to another locatinon on UV workspace, so they won’t be uverlapping and will be easier to select later.
14. I assume You readed my LODs and Optimization tut and especially it’s part about UV mapping and You know about UV cluster placement rules.
15. Still in Edit UVWs, Select all polygons from the sphere, click Tools->Pack Uvs, this tool allows to normalize all UV clusters and place them as tight as possible. (set spacing to 0,01, and check all other options avaible 🙂 )
16. Hit Tools->Render UVW Template, set the resolution to Your needs, change mode to solid so You’ll have cluster filled with desired color.
17. Paint UV map in any 2d application and bring it back to 3dsmax… You’re done 🙂
This should be all, I’ll extend this tutorial if anyone will think it’s not enough… e-mail me if so. 🙂
(c) Wojtek “Buddy” Starak, buddy_gman@hotmail.com, www.blackwidowgames.com


Latest Comments