“Simple game riging” by Sean Hewit
Skinning.
This is typically the process I use for skinning. For a simple rig like this I could just select the cog to select all the joints and select the skin. But I prefer to select each individual joint. The reasoning behind this is when I build more complex rigs there are disjointed limbs and joints in the hierarchy not meant to be skinned to but rather drive other joints. So in this case this is more a matter of habit than necessity.
So, working my way up the outline I select all the individual joints, and then finally the skin.
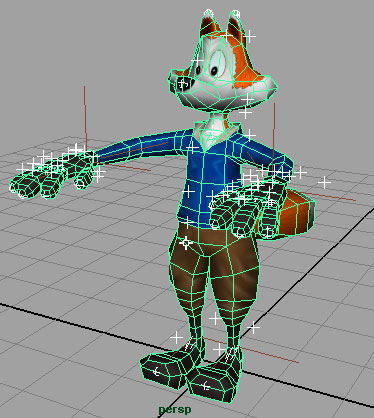
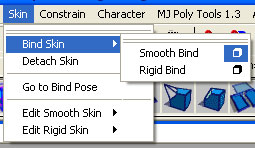
Next, we’ll smooth bind the skin to the rig. Lets start with the skinning options first.
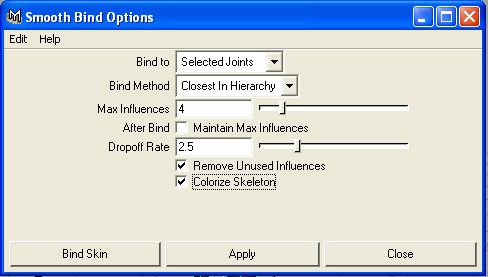
So since we have each joint selected we’re going to set to Bind to Selected Joints. We’re going to skin the geometry to the Closest Point in Hierarchy. 4 joints max will have influence over any vert. And the automatic fall off rate it will assign is 2.5 for now. Drop off rate in this case isn’t all that important. It tends to help out more on high poly models. Low poly models are so manageable though that we’ll most likely repaint everything by hand.
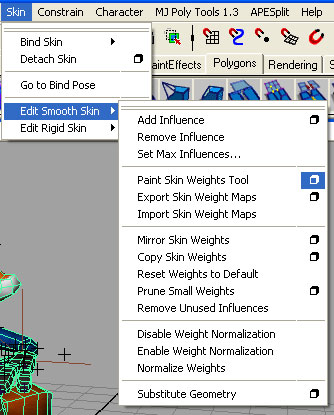
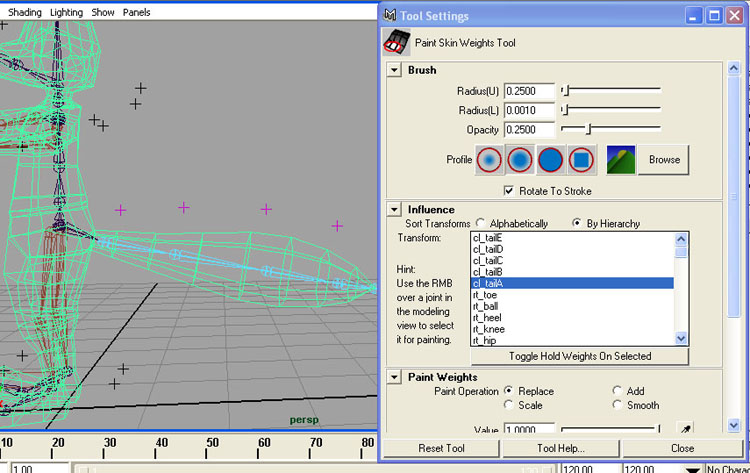
So next we’ll edit these skin weights by painting them on. Select just the skin and let’s open up the Paint Skin Weights Tool.
Text and pictures can only explain so much in this area. I’m going to use the tail and some of the head as a general example of what I’ll do for the whole thing. You can see the various joints are listed here. Again, this is another good example of why it’s important to name everything in a scene. You can see if I’m in wire frame I can see what joint I have selected in my paint menu if I’m unsure. To paint weights I’m going to use a solid brush with no feathering. My Paint Operation is set to Replace so I know for sure what I’ve added to each vert. Opacity will be all the way up to 1.
A little pointer on painting skin weights. Using your value and the replace option on you can either paint less weighting or more weighting to a vert. Each vert can only have a grand total of 100% weighting to any joints. So if jointB has 70% weighting, and jointB has the other 30% weight, if we decide to repaint jointB to 45%, it has to take that extra 15% from somewhere. So it would take that 15% from jointA, so we would have 55% weighting on jointA and 45% on jointB.
But what happens if we instead try to paint less weighting? Is we paint 25% less than what was there, how does it decide where to go? In all honesty it’s not very predictable. It could put it on any of the near by joints, it could evenly spread it across other joints weighted to that vert, or it could do nothing with it so that vert isn’t weighted at all 25% and sticks in space.
The same predictability becomes hard as well if say you have five joints weighted to a vert. Joint A B C and D. What if you want to take 10% off of joint D and add it onto joint A? You could try painting on the extra 10% to joint A, but how does it know which joint to take it from?
If you’re trying to be specific, you can see how things get tricky. The good news is you rarely have to be specific. It’s simply about painting what looks good. But having a little understanding of how the tool is working does help make things more predictable. The approach I tend to take towards it is much like painting. Block everything out fairly solid, and then smooth out the shading from there.
Simple game riging
One comment
Leave a Reply
You must be logged in to post a comment.


thanks,nice tut.
Is there any other way of fixing LRAs than using script.
Thank you.