Tutorial on how to draw steampunk looking items, step by step.
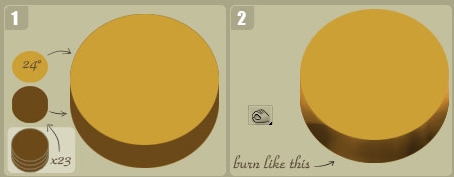
Step 1-2
Use the elliptical marquee tool to create a selection then fill it with a shade of brown; then hold down ALT+arrow up and duplicate the layer 24 times: the layers will duplicate moving upwards.
Fill the top layer with a dark shade of yellow, and merge all the others.
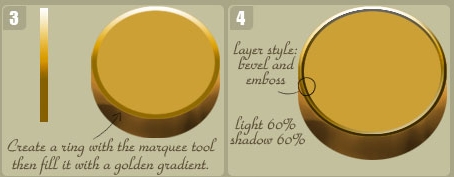
Step 3-4
Create a ring with the marquee tool then fill it with a golden gradient. Layer style: bevel and emboss – Light 60% / Shadow 60%
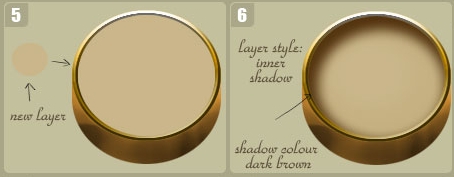
Step 5-6
Create a new layer. Layer style: inner shadow – Shadow colour dark brown.
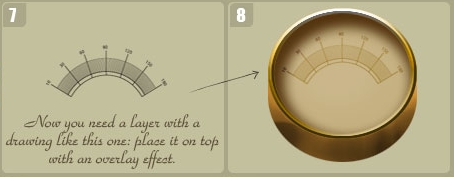
Step 7-8
Now you need a layer with a drawing like this one: place it on top with an overlay effect.
Step 9-10
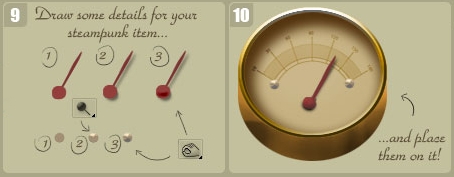
Draw some details for your steampunk item and place them on it. You can use your reference images.
Step 11-12
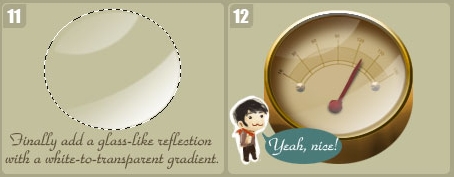
Finally add a glass-like reflection with a while-to-transparent gradient. And that’s it!!!
Final Image

If you looking for texture for nice looking items, we recommend visiting environment-textures site.


Latest Comments