“Making of The Crates ” by Tjerk Otten
Texture Mapping and Unwrapping.
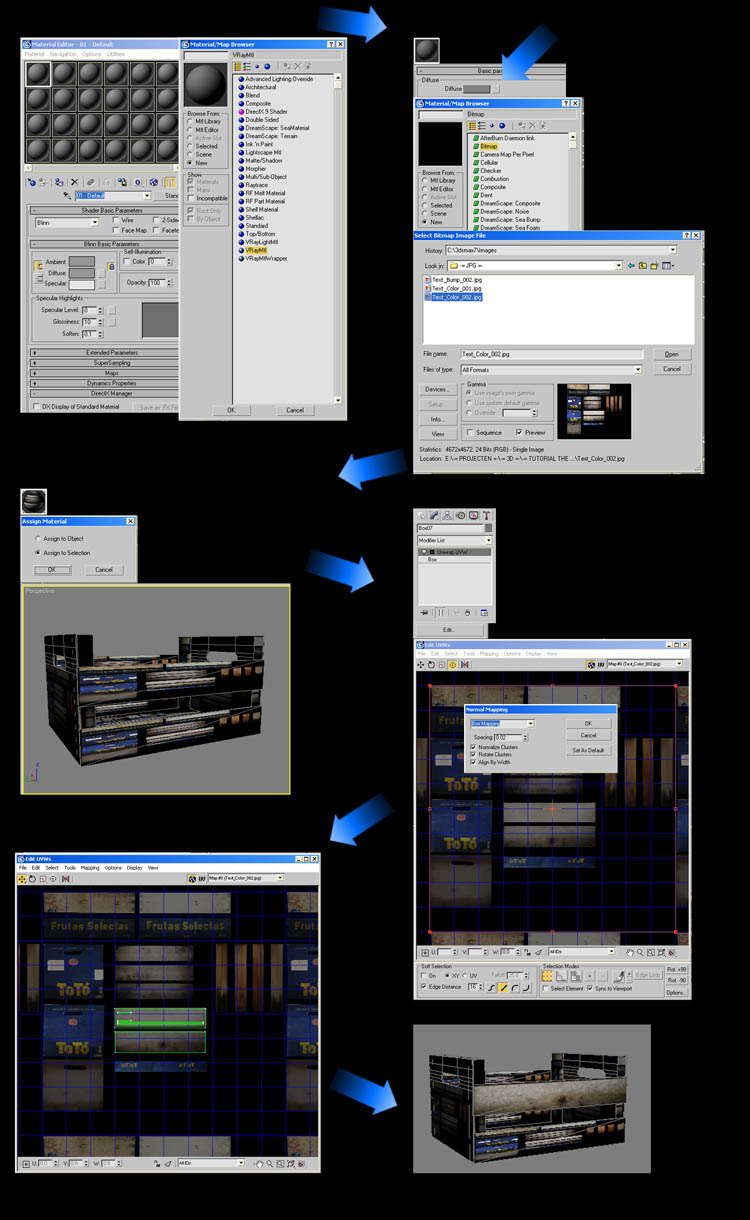
So what to do next. Lets go into the library map and pick a vray material type rendering as shown below. After you have done this choose the diffuse map and than browse through your files and find the file that contains the texture unwrap of the crate. Than apply this texture to your mesh and apply the unwrap on every object of the mesh. Than choose edit and in your texture editor choose box mapping. Than you can place the segments in the right place and you will see things changing in your viewport. Hope the pictures help.

Displacement mapping.
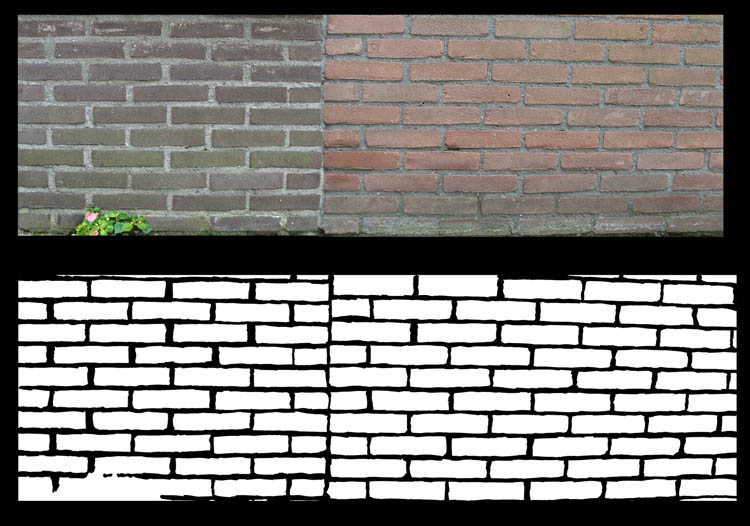
So, i want to talk a little bit about displacement mapping. The beauty of this tool is that you can create advanced depth with a flat mesh. So where you can make structure with bump mapping, displacement mapping actually changes the mesh while rendering, bud in your view port it looks flat. So you don’t have to make a complicated mesh to make a realistic wall, you can just make a black and white plate in photoshop . So you use your texture map and than make the plate in photoshop. It can take some time bud its worth it.

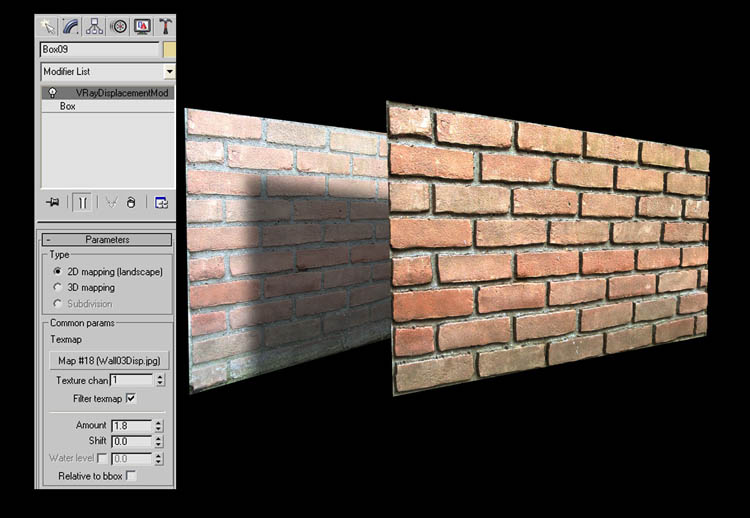
Apply the texture of the wall to a plane or simple box than use the vray displacement modifier to it and choose the black and white plate you made. Set the modifier to 2D and choose your depth.

Finishing The Scene
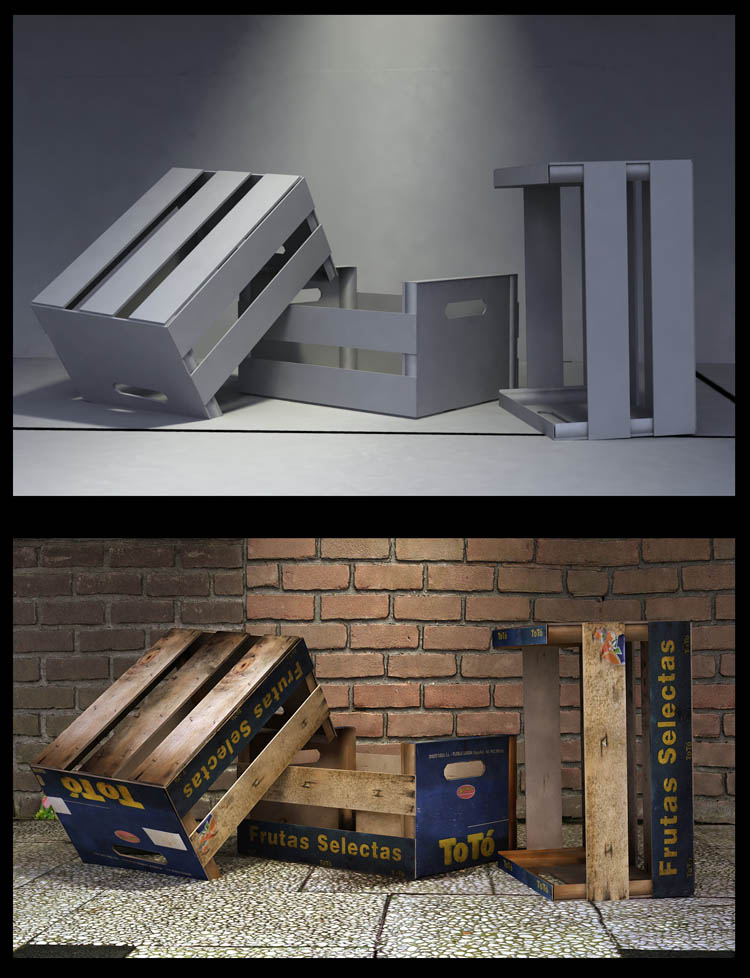
So lets finish this scene. I made a concept for this tutorial bud that wasn’t where this tutorial was about. I hope you’ve learned something more about texturing. Ill show the scene again without textures and that with all applied.
Enjoy your texturing!

(c) Tjerk Otten , www.tjerkotten.com


Latest Comments