“Making of Fruit Tarts ” by Hau Ming (Jamie) Li
For the blueberries, I used a NURBS sphere, converted it to a polygon so I could texture it better, extruded the edges to make the leaves and of course reversed normals. Then when I positioned them, I duplicated the original, rotated them, flipped some of them upside down, and scaled the size smaller or bigger to make the blueberries look random.
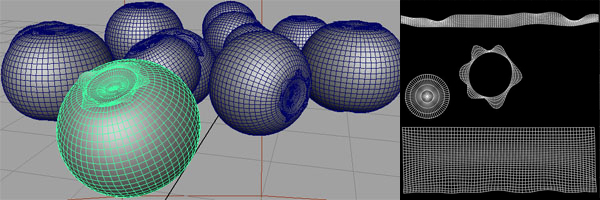
For the pomegranate seeds, I duplicated the polygon seed and scaled it out to create the meat part. I actually didn’t know they were pomegranate seeds in the photo concept. For over a week, I seriously thought they were cranberries even though I couldn’t find the actual fresh fruit in the supermarket, (at least that was what my American instructor told me,) till my Brazilian instructor walked by one day and pointed out what they really were because his country sells them. So knowing exactly what you are modeling and texturing is a very good thing.
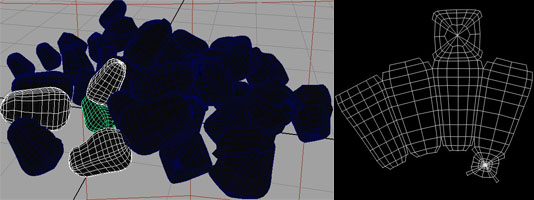
Texturing
Before I explain about texturing my project, let me show you the old version of the fruit tarts, my first draft which I posted up on cgchannel. At the time, I wanted to create another food scene that is fast to render with very minimal skin shaders. As you can see it is not photorealistic. In that scene, I used a phong and fractal for the gel custard, a fractal and phong for the blueberries, and a fractal and a misss_fast_simple for the raspberries. Then there are the pomegranate seeds, melons and pineapples that no one can tell apart. It rendered 7 minutes a frame using very little final gather instead of an hour a frame like the Cheese Platter. Although, it rendered really fast, the quality of both the models and textures were not there, didn’t even come close to Ratatouille quality. So I went back and remodeled all the fruits, replaced the melons and pineapples with red and green grapes. I used file textures for everything instead of procedural shaders except the blackberries to have more control in making it photorealistic looking. I also used a misss_fast_skin shader for the custard instead of a subsurface phong, as well as a misss_fast_skin shader for the raspberries and grapes instead of using the misss_fast_simple shader. The misss_fast_simple shader is very basic, renders faster than the skin shader, but doesn’t offer much specularity control to make the fruits wet looking without the use of little transparent spheres.
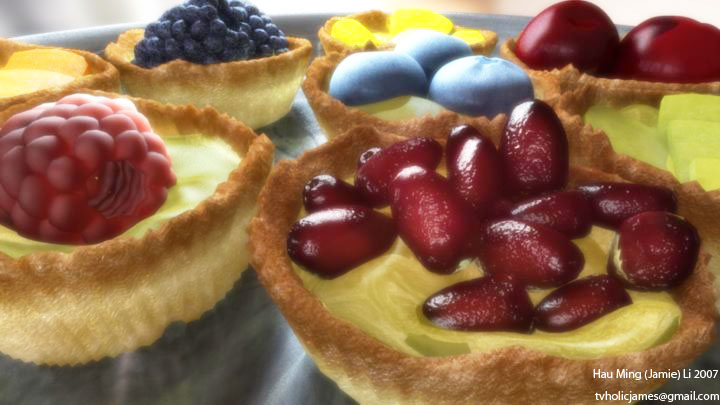
This tutorial is more for people who already know how to set up a skin shader which looks like this.
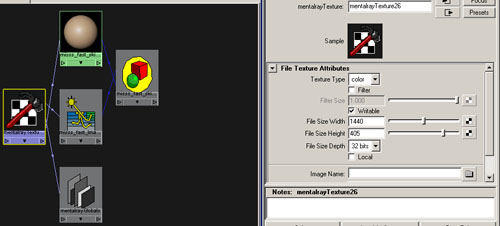
If not, read this tutorial from lamrug. Also, it would help if you read my Cheese Platter tutorial as well.
www.lamrug.org/resources/doc/sss-skin-tutorial.pdf
For the tray, I used a blinn instead of a mia-material because of the low cost of rendering time. The mia-material requires physically accurate lights like Final Gather and Global Illumination to make it look good and a blinn does not. Depending on the closeness of the camera, a tray with a mia material renders longer than a tray with a blinn. Here is the file I used for the color and reflectivity along with the specular attributes of the tray.

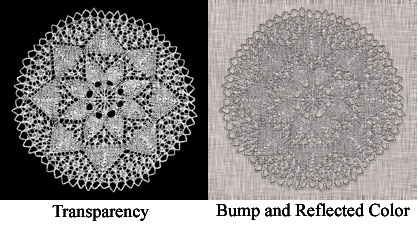
For the doily, the biggest picture I can find on the internet was 500 pixels wide with no alpha channel information. So I scaled it out to 2048 and used the magic wand tool in Photoshop to take out the black background. Then I used brightness and contrast and moved the sliders to fill the missing white color of the doily and it looks good as new. I called that my transparency layer which I saved as a targa 32 file. For the bump and reflected color maps, I filled a blank layer with noise, then motion blurred it, duplicated that layer, rotated it 90 degrees and played around with the layer and opacity in Photoshop to create that cloth-like criss-crossed look. Then I merged those two layers which I put the merged layer on top of the beveled doily so the doily will have a pattern for the bump layer. I saved that as a targa 24 file for my bump map. I used a lambert in the beginning, but for some reason, it kept coming out blurry behind the shadows of the crusts. So I changed to an anisotropic material with little specular. Here is the transparency and bump map.


Latest Comments