“Magmaball tutorial ” by Philipp Pilatzki
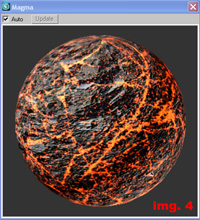
Now you have a basic “hot-glowing” material. Go back to the “blend” material click the button next to “Mask” (None) and apply a bitmap (cracks for example). If you got everything right, the first step is done! (img. 4)

Open the render dialog (MentalRay should be active) switch to the “Renderer” tab and scroll down to the “Camera Effects” rollout. Under “Camera Shaders” click the button next to “Output” and assign a “Glare” shader. Now render the sphere to see the glow effect. Yea … you have a glowing magma like material!
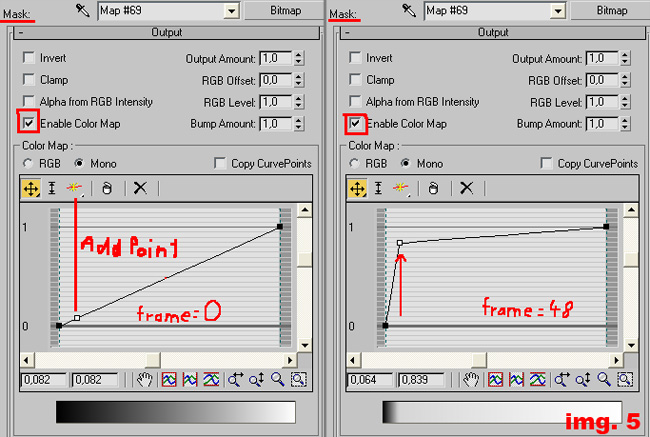
but … we need one more step to bring a bit life to it. Open the “Mask” slot where you have applied the crack image, scroll down and open the “Output” categorie. Check “Enable Color Map” add a new point to the curve (quite close to the left point!!!) and animate it up over the time. (img. 5)

This causes that the mix map will change its black/white values so the magma material comes out stronger. You only need to set up the “Glare” shader how you like it (I changed the spread to 1,1).
Then copy the animated crack map into the “Displacement” slot of the magma material (choose “Instance”) and animate the displacement value. (frame 0 = 0,15 -> frame 48 = 0,5 but it depends on your scene) You don’t need this step but it helps a little bit to underline the pulse effect.
Ok, everything is done … phuu but since we want the sphere to illuminate the scene casting real light and shadow we still need to do a few small things.
First go to the “Indirect Illumination” tab in the render dialog and switch on “Final Gather” and set the preset to “Draft”. The glow material now illuminates the scene but we need a light-source to cast real light and shadow.
Create an “Omni” light align and link it to the sphere change its settings and the “Far Attenuation” parameters that it doesn’t illuminates the whole room (img. 6.).

Create two other omni lights which helps illuminating the scene (img. 6).
ok… ok… here comes the very last step … our material, scene and render-setup is almost complete but we animated the displacement- value and the crack maps output value only in one direction but we want to have a pulse effect.


Latest Comments