Another tutorial for you to enjoy! Again, it’s long- but, not so much reading really. I hope it helps anyone that needs assistance in drawing feet.

So you want to draw feet huh? Well, good luck with that…
Of course you do! Why else would you be here? Actually… why are you here? Do you enjoy being tortured? Perhaps you’re braver than I first thought. Well, I have some pills if you need them…
Nah, I’m here to help. Or at least not corrupt you too much. Muahaha *koff*. We’re going to talk about the foot now. Be excited!
Feet are one of the hardest things to draw on the human body next to the hands. Once you get use to them though, they become one of the funniest things to draw! (Trust me)
First, we shall cover the basics and then just simply show how you can go about drawing the foot.
Hey, I told you to be excited!! >.>;
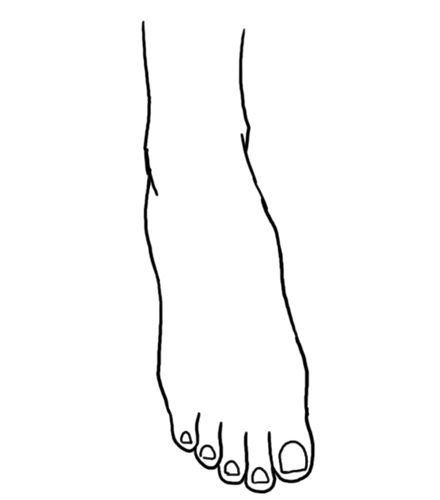
Step 1
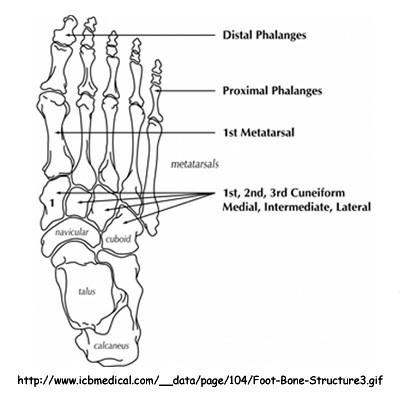
First off, the basic bone structure of the foot. Yes, it’s important to know how this the foot is put together under all your skin and muscles. It helps give your mind a visual of just how solid a foot is instead of just a blob with toes.
(I found this online to save me the trouble of drawing it myself. Link has been provided.)
It’s not so much important to remember each bones name- unless you’re OCD or an anatomy student. xD; Just understand how they go together.
Like- well, like that! —->

Step 2
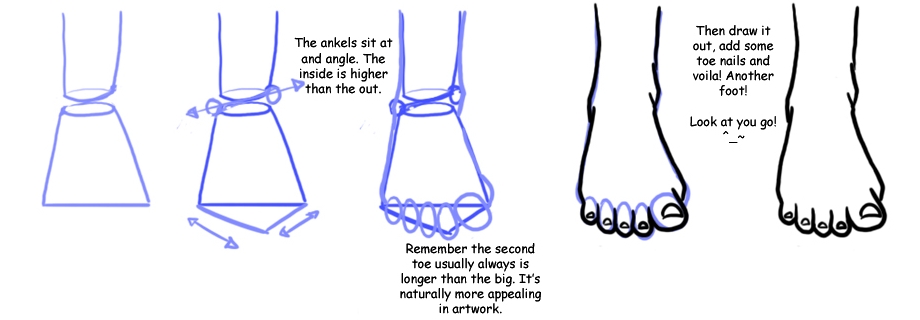
Okay, so here’s where we leave all the text book junk behind and move onto drawing a foot according to me! *koff* So first, draw a simple shape- blocks, triangles, circles and cylinders are your new best friends. (I’m sorry if they’re your only friends now… not my fault. x0)
Then basically you draw out how the foot curves. Like so…

Step 3
Now for the front view. The front view is more challenging because it involves foreshortening. Nuu!! Scary eh? Oh buck up, you’ll survive. Start again with basic shapes. Just a slanted rectangle and cylinder for the leg. Then add in some lines for where the toes will go.
Step 4
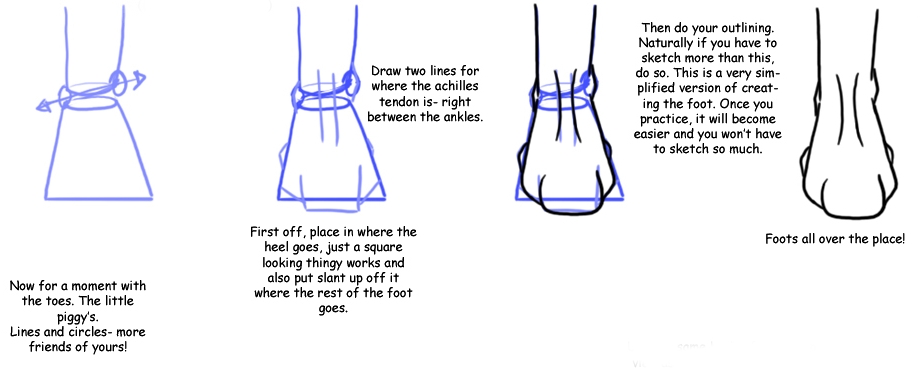
We must address the back of the foot, even though it’s not drawn as often since more pictures ore front view. But, for those of you who are variety types, here you go.
Again, basic shapes to start, the angle of the ankles (say that 5 times fast)

Step 5
Then, you can take all these elements and practice drawing your feet! Use blocks for the main part of the foot, circles for the toe and where the ankle is and then a cylinder for the leg. Soon it will become easier and more natural for you to draw them. It takes patience in all artwork, so don’t stress if it isn’t as easy to do when you first start off. Just keep plugging away and use references, even your own foot (if you can bend it that well, ha!)
You are a good artist already, or you wouldn’t be aspiring to become greater!

Step 6
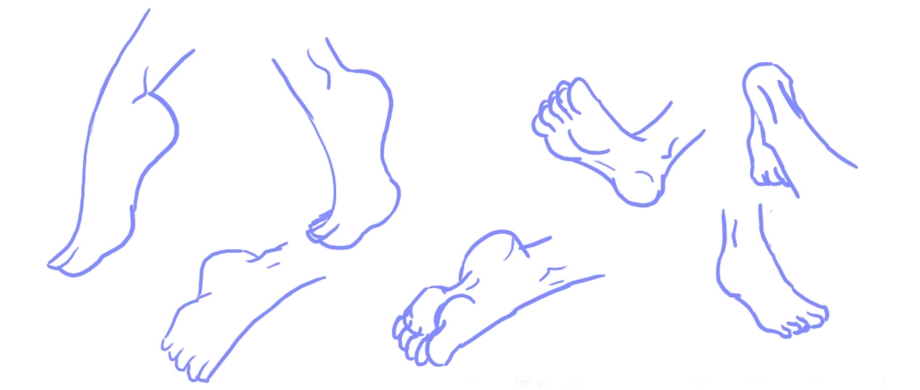
Here’s a few quick sketches of feet I did. Feel free to use them in your practice. Remember to use perspective, foreshortening and all those fun little things. You don’t have to be detailed as long as you get the basic shapes down, it’ll be a foot.
Happy drawing!!
Thanks for stopping by and I hope this was helpful! Keep practicing and never give up. Progression is slow sometimes, but that doesn’t mean it won’t happen.
Good luck!
To get texture of human body, we recommend visiting human-anatomy-for-artist site.


Latest Comments