written by Lee Johnson
I created this tutorial to show how to setup Render Elements in 3ds Max, and put them back together in Combustion, giving you more control to edit the rendered output. I also wanted this tutorial to cover what happens when its 3 AM and one of your render elements doesn’t render like you want it to. So there is some jury rigging in here, but hey its all about getting the project done on time.
Compositing for Production Renders – 3ds Max 2009/Combustion
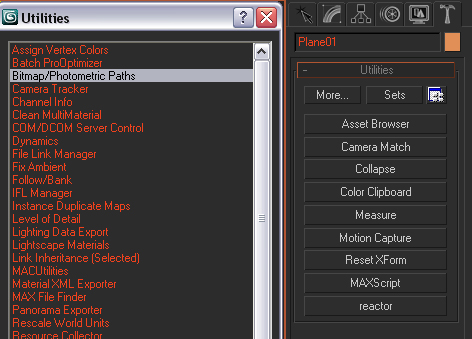
01. Download the scene files, and extract all the files to a directory of your choosing. Open the scene blackberry_elements.max. If you need to fix the material paths to get all the texture maps to load, go to the Utilities Panel, and click on “More” Click “Edit Resources”, and “Select Missing Files”. Hit the “. . . “ button, and browse to where you extracted the files. Now choose “Set Path”.
02. Next set your output path for rendering. Save as blackberry_.png, and choose a directory where you want all the render files to wind up. Under setup, set RGB 48 bit, and check Alpha Channel. If you have a render output set up, when you add your render elements, they will automatically target to that directory. Also set to single frame for right now. You can render out the full range after you get everything setup.
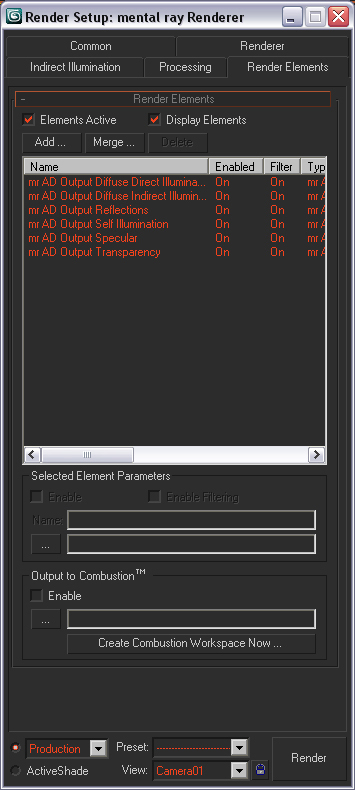
03. Go to the Render Elements tab of the Render Dialogue, and Click Add. Now highlight the following elements.
mr AD Output Diffuse Direct Illumination
mr AD Output Diffuse Indirect Illumination
mr AD Output Reflections
mr AD Output Self Illumination
mr AD Output Specular
mr AD Output Transparency


Me gusto el programa de 3d y lo que se puede hacer si me puedes enviar los pasos para hacer robot todos los pasos.
Gracias por los pasos de los tutorials nos veremos en otro memento