“Blueprintsetup” by Joshua Murphy
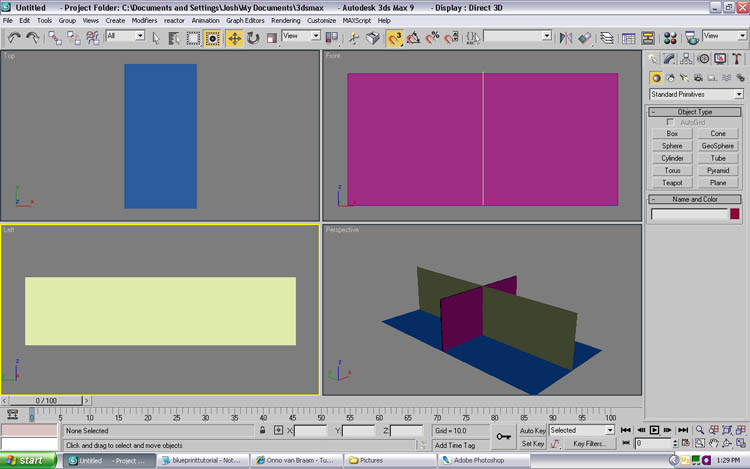
Ensure that the plane has the exact same measurement as your picture that we just found the dimensions for.
Follow this step for the Front, Top and Side viewports. When you have completed the steps, you should have something like I do below:

Now, it is time to apply the blueprints to the planes that we have made.
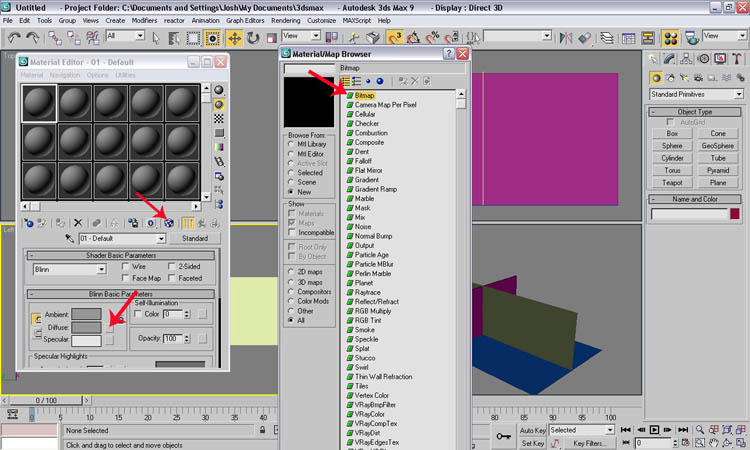
While in 3DS Max, open the Material Editor by going to the Main toolbar, and select the four (4) different colored spheres.

Or press the keyboard shortcut or “hotkey” M for the Material Editor.
When the Material Editor comes up, select any empty slot, and then select the Show Map in Viewport button; otherwise your blueprint images will not appear in the viewport, and then find the diffuse color slot. Select the box next to it, and then select Bitmap from the dialog box that pops up. From there search and find your
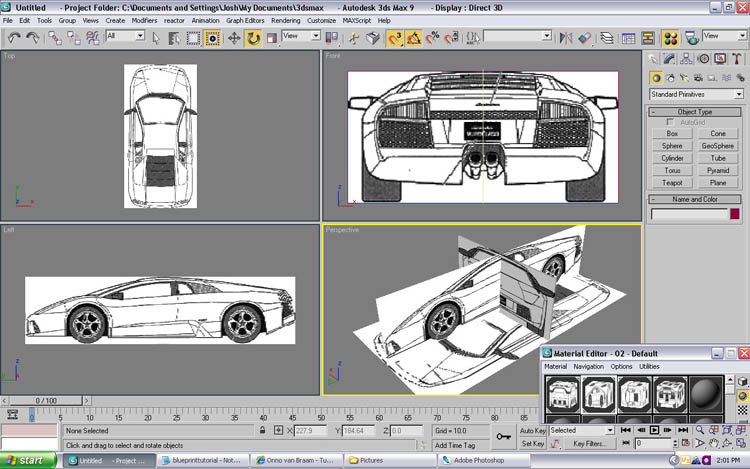
Blueprint for each view respectively. For each view, select a different Material slot.

When you are done, you should have something like the image below:

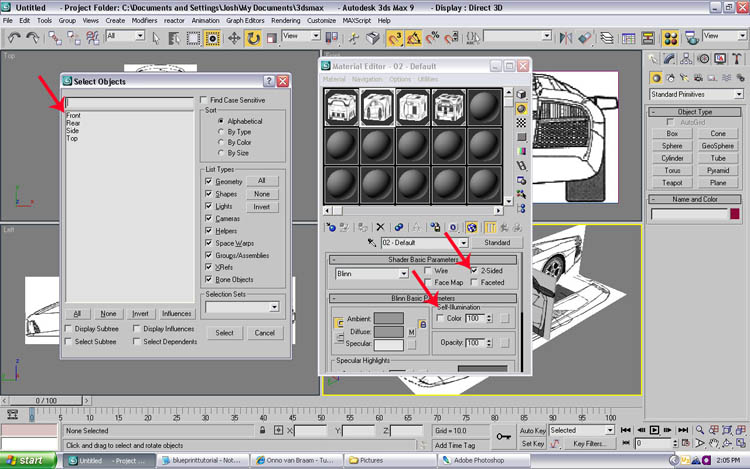
You may also want to rename the plane to correspond with the image, see below:

One more thing that you might notice is if the blueprints appear a little dark or hard to see, simply go into your Material Editor and under the Blinn Basic Parameters menu, turn the Self-Illumination up to 100 or any other desirable number for you. Also, check the box beside 2-sided. That will make it to when you are rotating your viewport, you will be able to see the blueprint no matter which angle you are at.
Now you are ready to model. If you have any further questions or if you enjoyed this tutorial, please feel free to email me or visit my website.
(c) Joshua Murphy, http://www.3dhuntsville.com
Pages: 1 2


so do we have 2 separate planes for front and back?!
can we use same plane for both front and back view?!