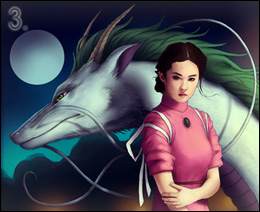
This is a continue of Digital painting tutorial – Spirited away – Part 3.
Part 4: Complex shading (~ 2,5 hours)

After we have defined the basic light sources we now want to create a realistic illusion of depth and plasticity. In this phase we will also create more atmosphere and another light source (the lanterns at the bottom). The most important thing is, that the painting looks well balanced and interesting from far away. Below are the detailed steps of part 4 – complex shading:
Step 1
On the background layer draw the three yellow lightbulbs of the lanterns with a big soft airbrush. Then zoom in and, on the masked layers, try to define the shapes and surfaces of Haku and Chihiro. In the last step we only painted the very basic shadows/lights, now choose even darker/lighter colors and add shadows/lights within the shadows/lights that we already painted. This will add more contrast, structure and plasticity.

Step 2
Go on with shading like in step 1. But add even more detail, think of every strain of fur and every little fold as an individual shape, which has its own lights and shades. Then I merged the different color layers, which were arranged in groups, to one layer each, so now I only have the layers “Background”, “Haku”, “Chihiro”, “Moon”, “Lineart”.

Step 3
Click Image > Correctures > Contrast/Color balance and play around with the adjusters to increase the atmosphere.

We will continue with next part 5 – Painting over lineart in following days, stay tuned.


 web.de


Latest Comments